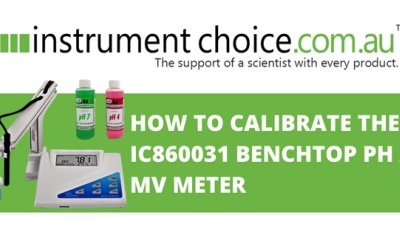
How to Calibrate the IC860031 Benchtop Digital pH / MV Meter

Calibrating your IC860031 digital ph meter regularly and before taking measurements will ensure your device is working correctly. The IC860031 offers two calibration options:
- Automatic buffer recognition using National Institute of Standards and Technology (NIST) standard buffers; and
- Calibration using custom buffers.
The easy-to-use automatic custom buffers group is the most popular option for Australia because some of the NIST calibration points are not used in this country. For this reason, this guide details how you perform a two-point calibration on the IC860031 pH meter using custom buffers.
Figure 1 Watch an Instrument Choice Scientist calibrating the IC860031 digital pH / MV meter here.
How to Calibrate the IC860031 Benchtop Digital pH / MV Meter
Tools Required
This article explains how to calibrate the IC860031 digital pH meter to two points, although it can be calibrated to up to five custom points depending on your required accuracy. You’ll need the following gear:
- IC860031 Benchtop Digital pH / MV Meter
- Distilled or deionised water (we used Deionised Water)
- Two calibration solutions (we used 01 and PH7); and
- Three clean containers.
Custom buffer ranges for the IC860031 include the following:
|
How to Perform a Two-Point Calibration
Once your meter is switched on and set up, you can start your calibration. If you are unsure how to assemble your meter, click here.
How to Select the Custom Buffer Range
To adjust to the custom buffer setting, press and hold the SET key for two seconds.
- Press the UP arrow until “buF” appears on the top line of the LCD.
- Press the ENTER key.
- Either “CUSt” or “NIST” will blink on the LCD.
- Press the UP arrow key until “CUSt” blinks on the LCD
- Press ENTER to confirm your selection.
- The device will return to the main settings menu. Press ESC to return to measurement mode.
How to Perform a Two-Point Calibration
After setting the device to custom buffer mode, it’s time to take a measurement.
- Pour pH7, pH4 and deionised water into each of the three clean containers. Ensure it is enough to submerge the electrode.
- Rinse the electrode in deionised water, then shake gently to dry.
- Immerse the electrode into pH7 buffer solution, stirring the probe gently to ensure a uniform sample.
- Press CAL to enter into calibration mode. On the LCD, you will see:
- The measured value
- The CUSTOM buffer value; and
- CAL, which indicates you are now in pH calibration mode.

- You will need to adjust the CUSTOM value (B) to match the calibration buffer standard in use – i.e., 7.00 for this example. To do this, press HOLD to move through the available buffer ranges. The screen displays the midpoint of each range (see table 1 below for an example). So for pH 7 buffer solution, press HOLD until 7.00 appears on the second line.
Custom Buffer Ranges
pH 1.00 to 3.00
pH 3.50 to 5.50
pH 6.00 to 8.00
pH 8.50 to 10.50
pH 11.50 to 13.50
Displayed midpoint
2.00
4.50
7.00
9.50
12.50
Table 1 The displayed midpoint for each custom calibration buffer range
- If the reading is stable (indicated by READY displayed in the top left corner), press ENTER to calibrate to pH7.00.

- The screen will blink as calibration is occurring.
- Once complete, the device will return to calibration mode. This time the measured value will be the same as the CUSTOM buffer value.

- Remove the probe from the buffer solution and rinse in the deionised water.
- Next, immerse the electrode into the second buffer solution, pH 4.01.
- Press HOLD until the closest range to the pH buffer solution appears (refer to table 1) – in this case, pH 4.50.

- Then adjust the CUSTOM BUFFER using the UP and DOWN arrows until the custom buffer reads 4.01, which matches the solution.

- Press enter to confirm and begin the calibration to this buffer point.
- As with the first calibration point, both lines on the screen will blink as the unit calibrates.
- Once complete, the device will return to calibration mode. This time the measured value will be the same as the buffer value (or within the expected range ±02).

- Two-point calibration is complete. From here, you can continue and calibrate the unit up to a total of five points. Or exit calibration mode by pressing the CAL/ESC button.
- The device will return to normal pH measurement mode and is ready to take accurate pH measurements.
Conclusion
The ability to calibrate to custom buffers on the IC860031 digital pH meter ensures you are not limited in buffer choices and can select the most suitable solutions for your application.
Need a hand with your IC860031 Benchtop Digital pH/MV meter? See the links below or contact us!
Additional links
- View the IC860031 Benchtop Digital pH/MV meter here
- Watch “How to Calibrate the IC860031 Benchtop Digital pH/MV meter” again
- Need a hand setting up your digital pH meter? Watch “How to Set up and Take a Measurement on the IC860031 Benchtop Digital pH/MV meter”.
- Want to see what comes in the box with the IC860031 Benchtop Digital pH/MV meter? Watch an Instrument Choice Scientist “Unboxing the IC860031 Benchtop Digital pH/MV meter”.
- Buffer solutions and water used in this video:
- Browse all pH buffer solutions here
- Read: Essential Solutions to Keep Your pH Meter Accurate and Reliable
Also interesting
Despite their tricky name, anemometers are surprisingly common tools. If you are not absolutely sure what an anemometer is, then this article is for you!
Read the article and find out precisely “What Is an Anemometer”.

At Instrument Choice, we proudly stock over 150 brands of scientific instruments and laboratory equipment. Our mission is to provide our customers with the widest selection of scientific instruments, all in one place, so you can measure anything and measure everything.
To help you find the best products to suit your application, our scientists regularly spotlight new brands so you can better know what they offer you. This edition features Gallagher and their expertly crafted and highly versatile range of accurate, wireless tank monitoring systems.
Click here to discover the Gallagher Wireless Tank Monitoring Systems

