How to Connect the Davis Vantage Pro 2 to WeatherLink Live (WiFi)

WeatherLink Live enables data streaming from a Davis Vantage Pro 2 weather station to the WeatherLink platform via WiFi. When you have WeatherLink Live set up, you can access your weather data on any internet-enabled smartphone or computer through Weatherlink.com or the easy-to-navigate WeatherLink app.
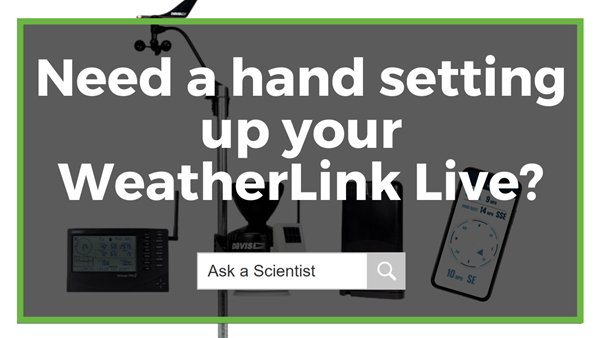
Figure 1 Watch an Instrument Choice scientist demonstrate how to connect the Davis Vantage Pro 2 to WeatherLink Live (WiFi) here.
How to Connect the Davis Vantage Pro2 to WeatherLink Live (WiFi)
Materials
You will need;
|
|
|
Before you attempt to connect to WeatherLink: VP2 stations with and without a console: Your VP2 ISS must be set up and powered up. Need a hand with setup? Contact us! |
How to Connect the Davis Vantage Pro 2 to WeatherLink Live (WiFi)
-
Download the WeatherLink live App on your phone and enter your login details. If you do not have a WeatherLink account, click “Sign up” and follow the prompts to create a new account.
-
Once signed in, click the account icon “” in the top right corner
-
Click the “Add” button (under the devices submenu).
-
Select “Weatherlink Live”.
-
Power up your WeatherLink Live using the included power cable. If required, you can insert 4xAA backup batteries.
-
Once powered up, the blue LED light will start blinking. Click “Next”.
-
Ensure your mobile’s Bluetooth is switched on, then click “Connect”.
-
Enter a name for your WeatherLink Live, then click “Next.”
-
Enter your location. Either find it on the map or enter it into the search bar. Once entered, select “Next”.
-
Read the service agreement and click “Agree”. Once you click agree, wait as the phone attempts to connect to the WeatherLink.
-
After you have established the Bluetooth connection, you need to select your internet connection. Click “Use WiFi”, then click “Next”.
-
Select your WiFi network, then click “Next”.
-
Enter your WiFi password and click “Next” again
-
Wait a moment as your internet connectivity is verified.
Troubleshooting Tip: If the connection fails at this stage, retry your password. If the problem persists – call us!
-
Once you have established a WiFi connection, there is an option to update from WeatherLink basic (free) to WeatherLink Pro. Either click upgrade and follow the prompts to upgrade or select “Use Basic”. Note: You can upgrade to WeatherLink Pro at any time.
-
You have now installed WeatherLink Live. The final step is to connect the weather station. Click “Add stations and sensors.”
-
elect the ID number corresponding to your pre-setup Davis Vantage Pro 2 station. If you can’t remember your transmitter ID, you can find it on the console or inside of the transmitter shelter.
-
After selecting the correct ID for your Vantage Pro 2, Click “Done”.
-
On the next page, choose the transmitter type. The options are; Vantage Vue sensor suite, Vantage Pro2 sensor suite, Sensor Transmitter, or Leaf/Soil/Temp Station. Select “Vantage Pro2 sensor suite” and click “Next”.
-
Specify your type of Vantage Pro2 package from the list, then click “Next”.
-
This screen allows you to check or uncheck the sensors you have on your VP2. When your sensors are selected, click “Next”.
-
Select the rain collector type, then click “Next”.
-
Give your weather station a name, then click “Next”.
-
Your station will now appear under the chosen ID along with all of the details you have entered. The last step is to click “Save”.
-
The device will appear under the “Stations” list on the WeatherLink app with the device name and location. There will be no weather information present. The station and WeatherLink should connect within 15-20 minutes, but it may take up to 24-hours in some instances.
IC TIP: If the screen states “station connection issue”, give the device some time to establish a connection before troubleshooting.
-
After giving the station and WeatherLink some time to establish a connection, refresh the app. Clicking away from then back into the station information will do the trick.
-
When the weather information appears on the app, your WeatherLink setup is complete. While on the same local network (WiFi or Ethernet) as your device, the WeatherLink App will stream live data, with data packets sent every 2.5 seconds. When the app is not on your local network, your current conditions will upload to WeatherLink.com and the WeatherLink app every minute.
Conclusion
WeatherLink live allows for the live streaming of weather data from your station to the WeatherLink platform via WiFi. Once set up, you can access your data via Weatherlink.com or the easy-to-navigate WeatherLink app using a smartphone or computer with an internet connection.
Want more information on Davis Instruments and WeatherLink live? See the links below or contact us!
Additional links
Products
-
See the complete specifications for the WeatherLink Live here
-
Looking for a station only? Shop the range of Davis Weather Stations here
-
Browse the full range of Davis Weather Station Kits
Articles
Videos
-
Unboxing the Davis Vantage Pro 2 Weather Station With Standard Radiation Shield (IC6152AU)
-
Unboxing the Davis Wireless Vantage Pro 2 Plus With Standard Radiation Shield. IC6162AU.
-
How to Connect the Davis Vantage Pro 2 to WeatherLink Live (WiFi)
Also interesting
Ergonomic, colour coded and built to last, the Nexty series of micropipettes facilitate precise and quick measurements in any laboratory application.
In this article, the Instrument Choice Scientists assess in detail the features and specifications of the Nexty series to help you find the right Nexty micropipette for your requirements.
Read on to view Instrument Choices’ guide to the Nexty series of Micropipettes

The Instrument Choice Team of Scientists regularly reviews new and popular products, so when searching for the perfect scientific instrument for your application, you can make more informed decisions.
This edition delivers an in-depth assessment of a brand-new addition to the Instrument Choice store, the UbiBot WS1 - an environmental monitor for industrial or commercial environments that measures four vital parameters:
- temperature
- humidity
- ambient light; and
Read on for our review of the impressive features, specifications, and examples of use for this IoT enabled environment monitor.
Get the comprehensive scientists’ review of the UbiBot WS1 here
