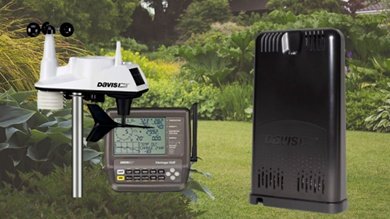
How to Connect the Davis Vantage Vue to WeatherLink Live (WiFi)

WeatherLink Live is your link between your Davis Vantage Vue weather station and the internet for real-time access to personalised weather reports from any internet-enabled device.
Figure 1 Watch an Instrument Choice scientist demonstrate how to connect the Davis Vantage Vue to WeatherLink Live (WiFi) here.
Materials
You will need;
|
|
Before Setting up your WeatherLink LiveVantage Vue stations with and without a console: Make sure your Vantage Vue ISS’ setup is complete, the unit’s power is on, and if you have an indoor console, it’s receiving weather data from the ISS. Need a hand with setup? Contact us! |
Recommended Procedure:
Connecting Your Davis Vantage Vue to WeatherLink Live (WiFi)
- Download the WeatherLink live App on your phone and enter your login details. If you do not have a WeatherLink account, click “Sign up” and follow the prompts to create a new account.
- Once signed in, click the account icon “” in the top right corner
- Click the “Add” button under the “Devices” subheading
- You will be prompted to select the device you wish to install. Select “Weatherlink Live”.
- Power up your WeatherLink Live using the included power cable. If required, insert 4xAA backup batteries.
- Once powered up, the blue LED light will start blinking. Click “Next”.
- Ensure your mobile’s Bluetooth is switched on, then click “Connect”.
- Enter a name for your WeatherLink Live, then click “Next”.
- Enter your location. Either find it on the map or enter it into the search bar. Once entered, select “Next”.
- Read the service agreement and click “Agree”. Once you click agree, wait as the phone attempts to connect to the WeatherLink.
- After establishing the Bluetooth connection, select your internet connection. Click “Use WiFi”, then click “Next”.
- Select your WiFi network, then click “Next”.
- Enter your WiFi password and click “Next” again.
- Wait a moment as your internet connectivity is verified.
Troubleshooting Tip: If the connection fails at this stage, retry your password. If the problem persists – call us! - Once you have established a WiFi connection, there is an option to update from WeatherLink basic (free) to WeatherLink Pro. Either click upgrade and follow the prompts to upgrade or select “Use Basic”. Note: You can upgrade to WeatherLink Pro at any time.
- WeatherLink Live installation is complete. The final step is to connect the weather station. Click “Add stations and sensors.”
- Select the ID number corresponding to your pre-setup Davis Vantage Vue. If you can’t remember your transmitter ID, there are two ways to check:
- Check transmitter ID on the console:
- If you have an indoor console unit, press and hold “2nd ”, then press “Done”.
- Press the “Done” key until “STA 1” appears on the screen.
- Press the left or right arrows to scroll through the channels until you find the stations connected channel. The screen with the station connected will read “STA X (Channel number) VUE ISS”. Memorise the channel number with the Vue ISS connected.
- Check transmitter ID on the ISS:
- To check the current ID, press and release the transmitter button ID on the outdoor station's base quickly.
- The LED will blink once. Then, after a short pause, it will blink any number of times between 1-8. The number of blinks corresponds with the transmitter ID channel.
- Check transmitter ID on the console:
- After selecting the correct ID for your Vantage Vue, Click “Done”.
- On the next page, choose the transmitter type. Select “Vantage Vue sensor suite” and click “Next”.
- Select the rain collector type, then click “Next”.
- Give your weather station a name and check or uncheck the primary station box. Then click “Next”.
- Your station will now appear under your chosen ID, along with all of the details you have entered. The last step is to click “Save”.
- The device will appear under the “Stations” list on the WeatherLink app, along with the device’s name and location. There will be no weather information available. While the station and WeatherLink should connect within 15-20 minutes, data can take up to 24-hours to become available.
IC TIP: If the screen states “station connection issue”, give your device up to 24 hours to establish a connection before troubleshooting. - After giving the station and WeatherLink some time to establish a connection, refresh the app. Exiting and reentering the app should do the trick.
- When the weather information appears on the app, your WeatherLink setup is complete. While on the same local network as your device (WiFi or Ethernet), the WeatherLink App will stream live data, with data packets sent every 2.5 seconds. When the app is not on your local network, your current conditions will upload to WeatherLink.com and the WeatherLink app every minute.
Conclusion
WeatherLink Live lets you live-stream the weather data captured by your Vantage Vue station to the WeatherLink platform via WiFi. With WeatherLink Live, you can access your data on any smartphone or computer with an internet connection via Weatherlink.com or the easy-to-navigate WeatherLink app.
Want more information on Davis Instruments and WeatherLink live? See the links below or contact us!
Additional links
Products
- See the complete specifications for the WeatherLink Live here
- Looking for a station only? Shop the range of Davis Weather Stations here
- Browse the full range of Davis Weather Station Kits
Articles
- Weather Station Technical Challenge: The Davis Vantage Vue vs the Vantage Pro 2
- Davis Vantage Vue Frequently Asked Question Guide
- Davis Vantage Vue Weather Station - Review of Features
- Davis Vantage Vue Weather Station Add-ons and Accessories
Videos
Also interesting
While pool water maintenance can be a drag, it’s a must for a healthy pool and will save you money. Correct filtration systems, together with balanced and sanitised pool water, protect swimmers, pool infrastructure and support sanitising agents' effectiveness (win, win, win)!
The best way to know your pool’s water quality is to test it all year round. You’ll need an accurate, reliable, and comprehensive water testing kit. With the right gear, accurate testing takes only minutes – then you can be sure your pool is sparkling, safe and not at risk of damage all year-round.
What parameters should I test in my home pool? Dive into this weeks article to find out.

If you deal with the commissioning or servicing of heat pumps, refrigeration and air conditioning systems, or you’re sick of impractical, hard-to-read LCDs or cumbersome hardware, then say “hello” to the new smart wireless digital manifolds from Testo!


