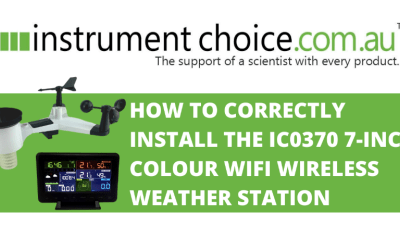
How to Correctly Install the IC0370 7 Inch Colour WiFi Wireless Weather Station

The IC0370 7-Inch Colour WiFi Wireless Weather Station is jam-packed with features that make it perfect for anyone interested in observing the weather, from novices to weather aficionados.
For accurate weather readings, it is vital to have your IC0370 weather station installed correctly. When we received a bunch of inquires from readers of our recent in-depth product review, we were motivated to create this list of 'how-to-correctly-install' hacks for the IC0370. So, if you are investigating the IC0370, or you own one, and can't tolerate inaccurate data, this article is for you!
About the IC0370 7 Inch Colour WiFi Wireless Weather Station
The advanced performance features of the IC0370 enable the measurement, calculation (where required) and storage of data for the following:
- Indoor temperature
- Outdoor temperature
- Indoor humidity
- Outdoor humidity/trend
- Barometric pressure
- Rainfall
- Wind speed
- Wind direction
- Light levels & UV index
- Heat index (calculated)
- Dewpoint (calculated)
- Weather forecasting (calculated).
Your collected hyperlocal data can transmit up to 100 meters (line of sight) to a visually pleasing 7-inch indoor colour display. On the model's indoor display, you can easily access all collected information, adjust viewing parameters, set alarms, and review high and low historical records. Access to data is not limited to indoor console viewing. You are free to view your weather data from your mobile or PC as the IC0370 is WIFI enabled and compatible with a host of third-party weather applications such as Weatherudnerground, Ecowitt, and more.
Video: How to Install the IC0370 – the Right Way!
Video 1: Watch an Instrument Choice Scientist install the IC0370 here.
A. Site Considerations
According to our team of advising scientists, there are five essential site selection factors:
1. Wind and rain sensor obstructions.
Obstructions such as buildings and trees may impact the accuracy of your rain and wind measurements. Consider installing the IC0370's outdoor sensors at a distance that's at least four times the height of the tallest obstruction.

Figure 1 Install the IC0370's outdoor sensors at a distance that's at least four times the height of the tallest obstruction.
2. Wireless range.
The IC0370 has a wireless reach of 100 meters line of sight. Physical obstructions such as buildings, vehicles, trees, and powerlines can compromise this range. When selecting your installation site, choose an area with the least amount of obstacles. If this is not possible, you will need to test some alternative locations before selecting the best resting site for your station.
3. Electrical interference impacting wireless range.
Strong signals from computers, radio, or televisions may reduce the device's wireless range. Take this into consideration when selecting the location of both your console and the outdoor station mounting. The trick is to keep both the indoor console and outdoor station approximately 1.5 meters away from electronic devices.
4. Heat transfer.
Avoid placing the sensors near structures that give off radiant heat. Install the sensor array a minimum of 1.5 meters from the ground, and away from any building, structure, or rooftop.
5. Maintenance.
Your weather station is not a 'set-and-forget' measurement tool. Ensure you have relatively easy access for occasional maintenance that will ensure your IC0370 supplies a constant stream of accurate weather data. (View the Instrument Choice "The Essential Weather Station Maintenance Checklist.")
|
IC TIP: Before installing your new IC0370 weather station, place it in a temporary position, ideally somewhere near your final mounting place but with easy access. Placing the station in a temporary location will allow you to become familiar with your device, quickly troubleshoot any issues, determine the range, and check out all the functions before finalising the installation. |
B. Station Assembly
Mounting Hardware
The mounting hardware consists of a metal plate, two 'U' bolts, and four nuts. We recommend you install the mounting hardware first to help avoid damage to the wind cups and wind vane.
1. Place the metal plate so that the straight edge is facing the radiation shield, and the grooved side is facing the mounting area.
2. Insert both the U-bolts into their respective holes on the metal plate.
3. Place and loosely screw the four nuts onto the end of each U-bolt. You will need to tighten these later during the final mounting. Place the wrench aside. You will need this to tighten the nuts when you mount the assembled station.
Wind Vane
4. Install the wind vane on the mount with the wind direction compass below. The shaft is flat on one side. This side will line up with the hole in the wind vane. Align and push the wind vane onto the shaft until it can't move any further.
5. Tighten the screw on the vane using a small screwdriver.
6. Check the installation - the vane should move relatively freely with a small amount of friction, and you shouldn't be able to remove it.
Wind Cups
7. Line the wind cups up and push onto the shaft until it can't move any further, then tighten the small screw on the cups using your screwdriver.
8. Check the installation - the cups should move freely, and you shouldn't be able to remove them.
Rain Funnel
9. The rain funnel has three grooves which match up with three grooves on the outdoor sensor suite.
10. Slot the funnel into place and twist to lock. The rain funnel should now be immovable.
Outdoor Sensor Power Supply
11. Locate the battery compartment on the base of the unit. Flip over the station, while trying to avoid resting or applying pressure to the station while it is upside down to prevent damaging the wind cups and wind vane.
12. Slide off the battery compartment cover to open and install the batteries, observing polarity. Then reinstall the battery cover.
13. The LED indicator should now turn on for four seconds, then flash once every 16 seconds.
14. Remove the sticker covering the solar panel.
Indoor Console Power Supply
15. Install the backup batteries in the battery cavity on the rear of the internal console and plug the console into mains power.
16. Once on, leave the indoor console and outdoor sensor suite near one and other for about 15 minutes to lock in the sensor signals.
17. Once 15 minutes have passed, spin the wind cups to simulate wind speed, the indoor console should display a reading. Once the indoor console and outdoor sensor suite are communicating, mount the outdoor sensor suite in the location of your choice, and your setup is complete, time to install!
C. Outdoor Sensor Installation
When you have selected a site for your outdoor sensor suite that meets the criteria outlined above, your installation becomes straightforward.
1. You'll notice four alphabet letters (N, S, E, and W) positioned just below the wind vane on the outdoor sensor suite. These represent North, East, South, and West. Accurately orientate the
letters using a compass to ensure precise wind direction readings. If you are unsure of the orientation and do not have access to a compass, there are plenty of compass Apps available on Android and IOS, or you can find your location and orientation on Google Maps. See Figure 2 (below).

Figure 2 Use the Compass Icon on Google Maps to determine your orientation.
2. With your outdoor sensor array positioned correctly, secure the unit on top of the (separately supplied) mounting pole or tripod.
3. Begin to tighten the U-bolts. As you tighten the bolts, pay close attention to the bubble level, making sure it remains properly centred.
Conclusion
The IC0370 weather station is a highly functional, easy-to-use, value-for-money weather station. The quick set up and installation is yet another bonus of a beautifully designed device that's generous with features.
Want more information on the setup and installation of the IC0370? Speak with an Instrument Choice Scientist! We're here to help! Call 1300 737 871 or email [email protected].
Also interesting
The IC-pH610B is a Bluetooth enabled pH and temperature tester that is rugged, simple to use, and recommended for everyday use. The unit pairs seamlessly with the free Jenco app, which provides a convenient way to obtain accurate and reliable pH and temperature readings – straight from your mobile or tablet.
This article details how to connect your IC-pH610B Bluetooth pH/Temperature Tester to the Jenco Wand App for instant pH measurements via your mobile.

The IC0370 Wireless Weather Station is a highly functional instrument that offers WIFI connectivity. Connecting the station to WIFI and linking to third-party applications, such as the Weather Underground app, allows you to share and access your data anytime, anywhere.


