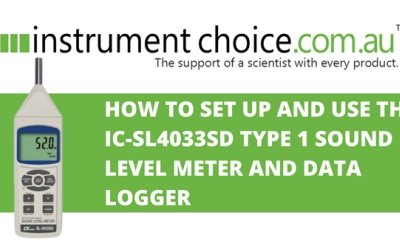
How to Set Up and Use the IC-SL4033SD Type 1 Sound Level Meter and Data Logger

Straightforward, full of features, and shipped with everything needed for logging precision sound level measurements, the IC-SL4033SD Type 1 Sound Level Meter is perfect for professionals performing environmental sound level monitoring studies.
Figure 1 Watch an Instrument Choice Scientist demonstrate how to set up and use the IC-SL4033SD Type 1 Sound Level Meter and Data Logger here.
How to Set Up and Use the IC-SL4033SD Type 1 Sound Level Meter and Data Logger
Battery Installation
To install the included batteries, you will need a small screwdriver.
- Unscrew the two screws on the back of the unit and remove the battery compartment door.
- Install the batteries, observing polarity.
- Replace the battery compartment door and tighten the screws.
- Press the POWER/ESC key to switch on the meter.
Basic Functions
Frequency Weighing Selection
- To choose a frequency weighing, press the A/C button. The frequency weighting indicator on the LCD will update instantly.
- “A” weighing is characterised as the “human ear response”. Use this when making environmental sound level measurements.
- “C” weighting is characterised as a “flat” response. C weighting is suitable for checking the sound level of machinery.
Range Selection
The default range is AUTO. WIthin AUTO range, the IC-SL4033SD Sound Level Meter automatically spans the range of 30 to 130dB.
- There are three manual ranges on the IC-SL4033SD. Each press of the RANGE button cycles through the options;
- 30 to 80dB
- 50 to 100dB; and
- 80 to 130 dB.
- After cycling through the three manual options, pressing RANGE a fourth time will cycle back to the AUTO range.
Time Weighting Adjustment
- Each press of the FAST/SLOW button cycles between the time weighting options. The corresponding setting displays on the LCD.
- Fast (t=125ms): This range simulates the human ear response.
- Slow (t=1s): Slow frequency weighting makes it straightforward to indicate the average noise level in an environment where sound levels are constantly changing.
Data Hold
- During a measurement, press the HOLD button to freeze the current reading on the LCD. The measured value along with HOLD will remain on the LCD.
- Press HOLD a second time to end hold mode and resume taking sound level measurements.
Minimum and Maximum Data Record
- Press the REC button to begin recording maximum and minimum data. REC will display on the top of the LCD. When REC is on the display, minimum and maximum data is being recorded.
- To view maximum recorded data, press the REC button once. REC MAX will appear on the LCD along with the maximum recorded value.
- To view minimum recorded data, press REC a second time. REC MIN will appear on the LCD along with the minimum recorded value.
- To delete the current maximum or minimum value, navigate the relevant screen and press the HOLD key. The device will continue the record function and start saving new maximum and minimum values.
- To exit minimum and maximum record mode, press and hold REC for around two seconds. REC will no longer appear on the LCD.
LCD Backlight
- Press the POWER key briefly to switch the backlight ON or OFF.
Data Logger Setup and Settings Adjustment
- Before data logger setup, install your SD card into the base of the sound level meter. The front of the SD card should face downwards.
- Press and hold the SET key to enter into the data logger settings.
Date and Time Settings
- Press and hold the SET key to enter into the data logger settings.
- The first option is SET DATE. Press the ENTER button one time to enter the date and time adjustment settings.
- The date appears at the top of the LCD. The value is in YY/MM/DD format and will blink when adjusted.
- Use the UP and DOWN arrows to input the year. Press NEXT.
- Use the UP and DOWN arrows to input the month. Press NEXT.
- Use the UP and DOWN arrows to input the day, then press ENTER.
- The time adjustment screen will display. As with the date, use the UP and DOWN arrow keys to adjust the hour. Press NEXT.
- Use the UP and DOWN arrow keys to adjust the minute. Press NEXT.
- Use the UP and DOWN arrow keys to adjust the minute, then press ENTER to confirm.
SD Card Decimal Setup
- After entering the minute and pressing ENTER, the screen will move onto the next setup option - card decimal character setup. Use the UP and DOWN arrows to choose a decimal display between:
- BASIC: this is a dot point “.”; or
- EURO: this is a comma “,”.
- Press ENTER to confirm.
Automatic Power Off
- The next setup option is the management of AUTO POWER OFF. Use the UP and DOWN arrows to choose an automatic power-off option between:
- Yes: The sound level meter automatically switches off after 10 minutes of non-use to save battery life.
- No: The device will remain on until manually switched off.
- Press ENTER to confirm your selection.
Key Beep Settings
- The next setup option is the management of KEY BEEP TONE. Use the UP and DOWN arrows to choose key beep options between:
- Yes: Key beep tone on; or
- No: Key beep tone off.
- Press ENTER to confirm your selection.
Sampling Time Selection
- The second last setup option is SP-t, this set SAMPLING TIME SELECTION. Use the UP and DOWN arrows to choose your automatic sound level sampling time between; 0, 1, 2, 5, 10, 30, 60, 120, 300, 600, 1800 or 3600 seconds.
- Press ENTER to confirm.
SD Card Formatting
- The last setup option is Sd-F; this is SD MEMORY CARD FORMAT. If it is your first time using this card in the meter, you should format the SD card. Note that this deletes existing data from the card – so be sure to check you have saved any critical data first!
- To format the card, use the arrow keys to select YES.
- Press ENTER.
- ENT will flash on the bottom of the screen. Press ENTER again to confirm card reformatting.
- All data will be cleared from the card. The device is ready to log data to the SD card.
Automatic Data Logging
Once you have selected your time and frequency weightings along with your sample rate, you can begin automatic logging to the SD card.
Start Automatic Data Logging
- Press the REC button. REC will appear on the top of the LCD.
- Press the LOGGER button.
- REC and LOGGER will begin to flash, indicating data is being saved to the memory card at your selected intervals.
Pause Automatic Data Logging
- If you need to pause data collection at any time, press the LOGGER button.
- LOGGER will disappear from the LCD, and REC will stop flashing but remain on the LCD. These changes indicate that data logging is in PAUSE mode.
- To resume data logging, press LOGGER again.
Stop Data Logging and Download Data
- To finish data recording, press LOGGER.
- Press and hold the REC button for two seconds. Both LOGGER and REC will no longer appear on the LCD.
- You can now push to eject the SD card from the base of the logger and insert it into your PC.
- On your computer, open the SD card file.
- Open the most recent file on the SD card.
- Then open the Excel file. All of your collected sound level information is available, sorted by the log number, date, time, measured value and measuring unit.
Manual Data Logging
Manual data logging allows you to save one data sample at a time. Within manual mode, you can also choose to set the measuring position. The measuring position is a value from 1-99, which you can use to identify a measurement location later. The measuring position number is handy when measuring multiple rooms or for comparison studies.
Manual Data Logging Setup
To manually log data, you must first return to the device settings to adjust the sampling time.
- Press and hold SET for two seconds.
- Press NEXT to navigate to the sample time adjustment setting (that is, “SP-T“).
- Use the UP or DOWN arrows to adjust this to 0.
- Press ENTER to confirm.
- Then press ESC to return to measurement mode.
Start Manual Data Logging
- To enter data logging, press the REC button.
- REC will appear on the top of the LCD and the current position number on the bottom.
- To take a manual reading, press LOGGER. Logger appears briefly on the screen as the reading saves. Each press of the LOGGER button manually saves a measurement.
How to Change the POSITION/LOCATION number
- Press the SET key.
- Use the UP and DOWN arrows to adjust the position number.
- Press ENTER.
Stop Data Logging and Download Data
- Press the REC button continuously for two seconds until REC disappears from the top of the LCD.
- Eject the SD card from the base of the logger and insert it into your PC.
- On your computer, open the SD card file.
- Open the most recent file on the SD card.
- Then open the Excel file. You will be able to view the measurement position numbers along with the date, time, measured value and the unit.
Conclusion
Once set up, the IC-SL4033SD’s manual and automatic data logging capability, paired with the straightforward SD card interface, is an ideal sound level monitoring solution for a broad range of applications.
Need a hand with your IC-SL4033SD Type 1 Sound Level Meter and Data Logger? See the links below or contact us!
Additional links
- View the IC-SL4033SD Type 1 Sound Level Meter and Data Logger (with Traceable Certificate & SD Card Included - Valued at $129+GST)
- Watch “How to How to Set Up and Use the IC-SL4033SD Type 1 Sound Level Meter and Data Logger” again.
- Want to see what comes in the box? Watch an Instrument Choice Scientist “Unboxing the IC-SL4033SD Type 1 Sound Level Meter and Data Logger”.
- View all Sound Level Meters at Instrument Choice
Also interesting
Digital Balances are devices used to precisely measure the mass of an object. The design and inner workings of a digital balance will vary substantially between brands. To help you determine the difference between models and find the best for your needs, our scientists have compiled a list of the standard key terms and definitions you are likely to encounter in digital balance specifications.
Get the standard terms and definitions you need to search for a digital balance

The Instrument Choice Team of Scientists regularly reviews new and popular products, so you can make more informed decisions when searching for the perfect scientific instrument for your application.
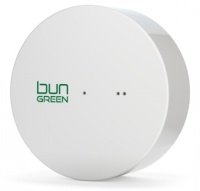
This edition checks out the bun Green CO2 and Temperature Recorder-Alarm Meter– a completely wireless indoor air quality monitor and alarm system.
Get the scientists review of the bun Green CO2 and Temperature Recorder-Alarm Meter

