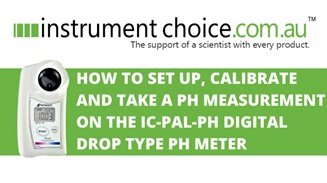
How to Set Up, Calibrate and Take a pH Measurement on the Atago PAL-pH Digital Drop Type pH Meter

Because the all-new Atago PAL-pH is simple to operate and requires only a tiny sample size, it's a winner for a wide range of pH measuring tasks.
Figure 1 Watch an Instrument Choice scientist demonstrate how to set up, calibrate and take a ph measurement on the Atago PAL-pH Digital Drop Type pH Meter here.
How to Set Up, Calibrate and Take a pH Measurement on the Atago PAL-pH Digital Drop Type pH Meter
Materials
You will need;
- IC-PAL-pH
- Calibration standards 4.01, 6.86 or 9.18 (included); and
- Water for electrode hydration and zero calibration.
Hydrate the Electrode
If the electrode was unused recently and dry, you must hydrate it to ensure accurate measurements.
- Place tap water into the sample well and leave the electrode to soak for a while. We left ours 30 minutes; and
- After soaking, gently clean away the tap water.
Calibration
The PAL pH allows users to calibrate one, two or three standard points (4.01, 6.86 or 9.18). Instrument Choice recommends a minimum of two-point calibration. Choose at least two buffers to shoulder your expected measurement range. For example, if measuring samples with an expected pH value of around pH5, you would calibrate to 6.86 and 4.01. For this example, we calibrated our Atago PAL-pH to pH 6.86 and 4.01.
- Start your calibration with pH 6.86. Place enough standard solution to cover the entire electrode (at least 0.6mL)
- Press the CAL button. The display will flash "---" on the screen until it recognises the standard buffer.
- When the PAL pH recognises the buffer, the buffer value will blink on the screen approximately ten times.
- When the value stops blinking, and the standard remains on the screen, the calibration is complete.
- Wipe the standard solution away using tissue and rinse with tap water.
- The meter is ready for the second point of calibration. The steps are the same as with the first point of calibration. Apply at least 0.6mL of your second pH solution (either 4.01 or 9.18) to the electrode.
- Press CAL
- The display will flash "---" as it recognises the standard solution.
- When the buffer is recognised, it will blink around ten times.
- When the buffer stops blinking and remains on the screen, the second point of calibration is complete.
- Wipe away the calibration solution, then rinse with water. You can choose to perform the third point of calibration with the remaining buffer or begin to use your meter to take pH measurements.
Measurement
- To take a measurement, place at least 0.6mL of your chosen sample onto the electrode.
- Press the START key.
- "---" will display as the meter reads the sample.
- After "---" disappears, the final, stable measurement is displayed.
- Clean the electrode after use.
Conclusion
The PAL-pH by Atago is an innovative new "drop- type" pH meter. To take precise readings, ensure the electrode is hydrated, your meter calibrated, and have at least 0.6mLs of liquid to sample – it's that easy!
As the Atago PAL-pH requires only a small sample size and it's so easy to use, this meter is ideal for many applications – like measuring the pH of foodstuffs, beverages, soils, cutting oils and cleaning fluids.
For more information on the Atago PAL-pH, see the links below or contact us!
Additional links
- View the IC-PAL-pH here
- Watch "How to Set Up, Calibrate and Take a pH Measurement on the Atago PAL-pH Digital Drop Type pH Meter" again
- Want to see what comes in the box? Watch an Instrument Choice Scientist "Unboxing the Digital Drop Type pH Meter (IC-PAL-pH)"
- Browse the full range of meters by Atago Instruments
- See all pH meters available at Instrument Choice here

Also interesting
Moisture meters measure the percentage of water within a material and take comparative moisture readings.
If you are looking to determine moisture levels within an existing building or assess material suitability during construction, this article is for you! Our scientists have assembled five handy hints to help you find the most appropriate building moisture meter for your application.
Read on to review the 5 tips!

At Instrument Choice, we proudly stock over 150 brands of scientific instruments and laboratory equipment. To help you find the best products to suit your application, the Instrument Choice Scientists regularly spotlight brands so you can better know them and the products they offer.
In this edition, we feature Davis Instruments, the leaders in personal and professional weather stations.
Read on to discover why Davis Instruments are so popular

