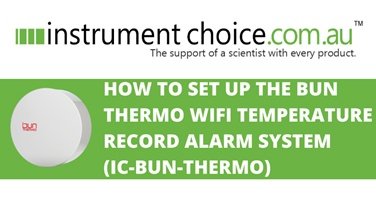
How To Set Up the bun Thermo WIFI Temperature Monitor Record Alarm System (IC-bun-Thermo)

The Loggerflex Bun range of smart, wireless WiFi data loggers is renowned for ease of use, reliable SMS and email alarms, an intuitive web platform and extraordinarily long battery life.
This article demonstrates how to set up your bun Thermo WIFI Temperature Monitor – an excellent monitor and recorder of temperature for general monitoring applications such as:
- Home and retail store fridges/freezes
- Room temperature in homes and offices; and
- Storage facilities.
Ensure you never miss an alarm again - learn how to correctly set up a bun Thermo WIFI Temperature Monitor so you can keep an eye on your temperature-sensitive environment.
Figure 1 Watch an Instrument Choice Scientist demonstrate how to set up the bun Thermo WIFI Temperature Monitor here.
How To Set Up the bun Thermo WIFI Temperature Monitor
Connecting the bun Thermo WIFI Temperature Monitor to EEMS
- Sign in to or create a Logger Master account at http://loggermaster.com.
- Once logged in, you will open up on the sensor viewing page.
- The left column is where you can select your type of logger. Options include Water, Gas, Electricity, Heat, Loggers & Controllers, and Counter. Click LOGGERS & CONTROLLERS.
- The top row of the page details the sensor setup and adjustment options. When no sensor is selected or connected, the following options appear:
- CLAIM:
 Click here to add a new device.
 - SEARCH:
 Search for connected devices.
 - TYPE VIEW:
 Click on the VIEW icon to Switch between “Desktop view”, “Mobile View”, or “Map view”.
 - TIP:
 Clicking here reveals tips for navigating the EEMS platform.
 - MY PROFILE:
 Clicking here will open a new profile settings page. Within this page, you can adjust time and language settings, change your password, and set up email, mobile and phone alarm receivers.
 - Log out:

- CLAIM:
- To set up your new sensor, click CLAIM.
- You will need to enter the device serial number and SSID. These numbers can be found on the back of the bun. Click NEXT.
- Give your device a name and click NEXT.
- Choose the preferred temperature readout unit between Celcius and Fahrenheit. Click NEXT.
- Set your required minimum and maximum alarm limit temperatures. Click NEXT.
- RECORDING is how often the logger collects
temperature information. - SYNCHRONISATION is how often your data is
uploaded to the cloud.
Note: The selected synchronisation time does not
affect alarms – you will be notified of alarms
immediately regardless of sync time selected (Unless
you have selected a delay in step 11!)
- Choose between immediate alarm notifications or set a delay before pushing alarms. Delay times can be chosen from the selections in the drop-down box. Click NEXT.
- Choose a recording and synchronisation Click NEXT. (For more explanation, see the panel on the right).
- Pin your location on a map to make it easier to manage several sensors based on location. Find your location on the map and click on the site to pin it. Click NEXT. Note: if you do not want to add your sensor to the map and skip this step, click NEXT.
- Return to your bun Thermo and press the SETUP MODE button on the back. The device will emit a beep.
- Return to your computer or mobile, open your WIFI settings.
- Search for and connect to the WIFI named “bun” (Ignore any “no internet” warnings).
- A new browser tab will open. If it does not open automatically, open a new browser tab and type “8.8.8.8”.
- Read the note and click NEXT.
- Select your WIFI network and enter in your WIFI password. Click NEXT.
- When the device connects to your WIFI successfully, you will hear four short beeps. If the connection fails, you will hear two long beeps. If the device failed, retry your WIFI password – this is the most likely cause of connection failure.
- When you have successfully connected, navigate back to the EEMS platform.
- Press REFRESH. Your bun Thermo WIFI sensor will appear on the device list.
How To Navigate the Logger Master EEMS Platform
- Navigate to http://loggermaster.com.
- Click once on the newly added device. This step will generate five more options on the top menu.
- The first new option is EDIT.
 Clicking into EDIT allows you to:
- View the device serial number
- Adjust the device name
- Adjust when to send alarms
- Switch the sensor ON/OFF
- Switch alarm upload ON/OFF
- Adjust or clear alarm values
- Adjust the temperature parameter readout
- Enter an installation location description and any relevant comments for the logger
- View the WIFI network the bun is connected to
- Create a password to enter set up mode
- View and adjust recording intervals
- View and adjust synchronisation intervals; and
- Set up shared access.
- The second option is SHARE.
 Under SHARE, you can set up user access by entering an email address. There are two levels of user access, select either viewers or editors and enter the person's email.
 - The third option is GRAPH.
 Under GRAPH, you can view all of your collected temperature information in a graphical format. For example, you can choose to view the last 24 hours, 7 days, 30 days 12 months or enter specific dates.
 - he fourth option, DETAILS,
 allows you view up to date logger details and data.
 - The fifth and final option is REPORTS.
 Here you can generate various tailored reports according to the needs and the standards of several industries.
- The first new option is EDIT.
- Whenever you make changes on EEMS, remember to click SAVE and synchronise your device by pressing SYNC NOW bun Thermo.
Conclusion
The IC-bun-Thermo is an outstanding choice if you’re searching for an accurate and dependable, easy-to-navigate wireless WIFI temperature monitor with alarm functionality.
Want more information or need a hand setting up your WIFI temperature monitor? Follow the links below or contact us!
Additional links
- View the bun Thermo WIFI Temperature Monitor
- Browse all WIFI enabled environmental loggers by LoggerFlex here
- Navigate to the LoggerMaster platform
- Learn how to create the EEMS application for Apple and Android devices
- Watch “How To Set Up the bun Thermo WIFI Temperature Monitor Record Alarm System (IC-bun-Thermo)” again
Also interesting
The BRM-100 is a sugar level refractometer that measures Brix from 0 to 32% in various food and beverage products like fruits, vegetables, juices, wine, soft drinks and sugar-containing non-food products like synthetic coolants.
Battery-free, portable and highly accurate (thanks to included temperature compensation), the IC-BRM-100 is the most popular choice for many Instrument Choice customers requiring quick, reliable Brix results on the go.
Learn how to calibrate and take a sugar level measurement with the IC-BRM-100 here

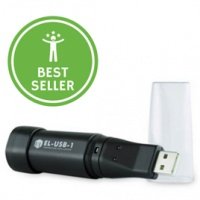
Did you know it’s been fourteen years since the EL-USB-1 USB Temperature Data Logger was first uploaded to the Instrument Choice website? In fact, it was the first product we uploaded – period! And what’s remarkable is that, in this era of rapid technological growth and innovation, the EL-USB-1 logger remains one of the most popular products we stock!
Click here to discover what makes the EL-USB-1 tick, what key challenges it can solve for you and why it remains an Instrument Choice best seller.

