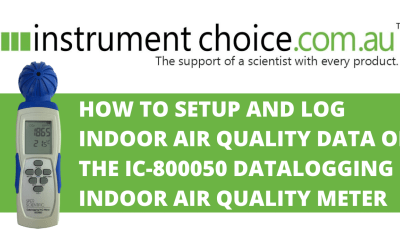
How to Setup and Log Indoor Air Quality Data on the IC-800050 Datalogging Indoor Air Quality CO2 Meter

High concentrations of carbon dioxide within indoor environments will result in tiredness, difficulty concentrating, and even illness (e.g., sick building syndrome). Crowded places or places with poor ventilation, such as offices, homes, factories, classrooms, hotels, and hospitals, are often places with elevated levels of CO2.
The very accurate and reliable IC-800050 data logging indoor air quality CO2 meter is ideal for measuring and reporting the key variables of indoor air quality; carbon dioxide, humidity, and temperature. The meter collects and stores up to 3200 data points onboard. Results can be downloaded to a computer using the free data logger software.
Figure 1 Watch an Instrument Choice Scientist Setup and Download Data from the IC-800050 Data logging Indoor Air Quality CO2 Meter here.
Installing the Software for the IC-800050 CO2 Meter
- Install the software. Go to www.sperdirect. com/software.htm and find your meter. (See the link under 'Additional Links' below).
- The software will download as a zipped file. Download and install both the driver and the setup.exe application.
- Plug your CO2 meter into a free USB port using the included USB cable.
- Open the software called 'Data Logger.'
- On the main screen, you may see either a warning saying the data logger is not plugged in (even if it is) or it will display 'Temp Humidity CO2'.
- If the logger warning displays 'Data logger not plugged in', continue to step 6.
- If 'Temp Humidity CO2' is displayed, skip step number 9.
- This warning displays should you select the incorrect port within the software. To adjust the port, go to Settings then Comm.port.
- Under Comm.port, the menu displays the port number, baud rate, data bits, parity, and stop bits. Select the correct port number. If you're not sure of the port number, perform the following;
- Open the device manager on your computer.
- Extend the ports (COM &LPT) section.
- View the connections available and record the logger's port. Still not sure of the connection? Take out and replug your data logger. The device will disappear and reappear from the list. Take note of the comm port and return to the software and adjust.
- Press save.
- If the comm.port is correct, the message at the bottom of the data logger software will state 'Temp. Humidity CO2'.
- The device is now ready for setup.
Setup the IC-800050 CO2 Meter
- Go to Setting then select Log setting.
- Here there are three tabs; Basic, Alarm & Sensor, and Setting. For each adjustment made press OK to save.
- Under the Basic tab,
- You can give the device a name, and
- Adjust the logger date and time.
- Under Alarm & Settings;
- The default alarm CO2 alarm value of 1000 ppm will be displayed. Adjust the ▲ or ▼indicators to change the value. Alternatively, click on the field and type in the new value.
- Select the data selection for the meter. Choose between logging temperature, humidity, and CO2, or any combination of the three.
- Under the Setting tab, you can choose the logging interval and how you would like to start the logger. For the start type, you can select between; immediate, real-time, key start, rollover, or schedule.
- Immediate - will cause the meter to begin taking readings as soon as the option is confirmed.
- Key start – Allows you to use the button on the meter to start logging at your desired time.
- Rollover - This option allows for continued recording even when the meter is full.
- Schedule - This option allows you to pre-set the date and time that the meter will automatically begin recording.
- Select the logging unit between Celsius and Fahrenheit.
- Pressing OK saves these settings. For this example, we selected the immediate start, so the logger will begin collecting data right away. It can be disconnected from the computer and placed in the desired location.
- When the meter is collecting measurements, the recording icon will appear in the lower left-hand corner of the LCD screen.
Download Data from the IC-800050 CO2 Meter
- Plug the unit back into your computer using the included USB.
- Open the software.
- Click the logger status button to stop recording.
- Then go to 'File' then select 'Download.'
- On the bottom screen message, you will see the data points downloading.
- Once the download is complete, a graph will the collected data will display.
- To display the values for a specific data point, click the left mouse button to move the red cursor (the red vertical line) to the desired position on the graph. You may also;
- Zoom in on a particular point: Hold CTRL and click the left mouse button.
- Zoom out: Hold CTRL and click the right mouse button.
- Move the graph: Hold CTRL and Shift and then click and hold the left mouse button. Use the cursor to move the graph.
- Reset the graph size to default. Perform this by clicking on the coloured bar next to one of the data parameters below the graph. Select a new colour. The graph size will return to default.
- Click the 'View' button and select 'Data Table' to view the data in table format.
- To print and data from the table or graph screens;
- Print: Click the Printer Icon button and enter the record range you wish to print (for example, 1-2,350) or leave the field blank to print all the records.
- Save: Use the icons on the top to save as a .csv file or a PDF.
Conclusion
Using the IC-800050 CO2 meter to monitor the air quality in crowded or poorly ventilated areas is a straightforward task. The IC-800050 data logging CO2 meter combines portability, accuracy, ease of use, and a data logging function. These benefits and features make it easy to track indoor air quality in your home or workplace.
Want more information on indoor air quality and CO2 meters? See the links below or contact us!
Additional links
- Click here to download the data logger software
- View the IC-800050 Data Logging Indoor Air Quality CO2 Meter here.
- Browse the full range of indoor air quality meters.
- Want to see what comes in the box? Watch an Instrument Choice Scientist Unboxing the Datalogging Indoor Air Quality Meter - IC-800050
- Watch 'How to Setup and Log Indoor Air Quality Data on the IC-800050 Datalogging Indoor Air Quality Meter' again.
Also interesting
Australians spend around 90% of our time indoors. Accordingly, it makes sense that the monitoring of indoor air quality in public places is essential for our health and wellbeing. The Sper Scientific IC-800046 measures carbon dioxide, relative humidity, and temperature, all of which have an impact on indoor air quality. Instrument Choice receives many inquiries regarding the relationship between carbon dioxide and humidity to indoor air quality, so we decided to create a step-by-step video guide to calibrating humidity using the IC-800046.

The mission of designers behind the multi-parameter uHoo Air quality reader is to provide users with the capability to understand the air they breathe and empower them to create a healthier home and workplace.
The uHoo indoor air quality reader accurately monitors nine indoor air quality parameters, including; air temperature, humidity, carbon dioxide, total volatile organic compounds, particulate matter, air pressure, carbon monoxide, ozone, and nitrogen dioxide. The sensor is straightforward to set up, and within minutes of taking it out of the box, you will have recorded indoor air quality data sent straight to your mobile device.

