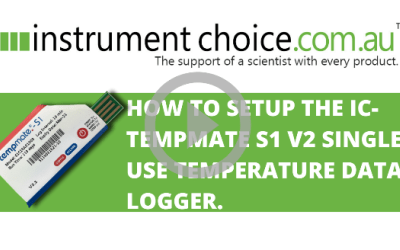
How to Setup the IC-Tempmate S1 V2 Single-use Temperature Data Logger

Single-use temperature loggers are vital devices used in many industries for the cold chain monitoring of items such as pharmaceuticals, blood transportation, as well as for food and beverage.
Single-use temperature loggers, such as the IC-Tempmate S1 V2, can quickly and easily provide vital data so you can verify that a cold chain or desired temperature was steady and uninterrupted during the transportation of goods. This type of scientific instrument is ideal in situations where it proves too difficult or expensive to retrieve the logger from a customer.
This video article will demonstrate how easy it is for you to set up and operate the IC-Tempmate S1 V2 single-use food-grade temperature data logger.
The characteristics that make the IC-Tempmate S1 V2 so suitable in cold chain monitoring are that it is:
- Food-grade
- Waterproof
- Single-use
- Simple to use, and
- The IC-Tempmate S1 V2 does not require any software to start-up or download recorded information.
How to change the setup the IC-TempMate S1 V2 Single-use temperature data logger
Note: Do not remove the temperature data logger from the plastic cover until you are ready to download recorded data.
Setup
- (1:14) The temperature data logger has one button and two LED indicators. These are ‘STATUS and ‘RECORD.’
- (1:22) There is a removable serial number label which will correspond with the recorded temperature PDF. Remove this label before shipping to keep for your records.
- (1:46) Before you begin, check the status of the TempMate. To do so, press and release the ’ON’ button. If the device has not yet started recording, both the ‘STATUS’ and ‘RECORD’ button will flash one time. Note: you can use this same method to check the status while recording.
- (2:09) To start recording, press and hold the ‘ON’ button for 5 seconds. The green ‘RECORD’ LED will flash ten times.
- (2:25) You can confirm the device has started recording by pressing the ‘ON’ button once. If recording, the ‘RECORD’ LED will flash once.
- (2:33) The temperature data logger is now ready for shipment. Be sure to note the time started or time put into place, as this does not have a delayed start.
INSTRUMENT CHOICE: HOW TO GUIDE
Additional Links
- Download a printable PDF instruction sheet of ‘How to set up the IC-TempMate S1 V2 Datalogger.’
- View a video on how to download data from the IC-TempMate S1 V2 Single-use temperature Data Logger here.
- Check out the IC-TempMate S1 V2 Single-use Temperature Data Logger product page and specifications
Also interesting
The Kaiterra Laser Egg+ CO2 is a smart air quality monitor that informs you of the condition of the air you are inhaling. The instrument monitors fine dust particles, smog (PM2.5) and carbon dioxide in real-time. This video article demonstrates IC-LE-202’s super straightforward set up so you can begin collecting accurate indoor air quality data.

The IC-12215 Certified Alarm Fridge-Freezer Thermometer is a precise, dual-channel digital thermometer. On the end of a 3-metre long cable, encased in a propylene glycol solution, is the external sensor. The sensor is encased in this solution to protect against rapid temperature fluctuations caused by frequent refrigerator or freezer door openings. This accurate, certified thermometer is suitable for use for pharmaceutical monitoring as well as in restaurant kitchens, food manufacturing, and processing.

