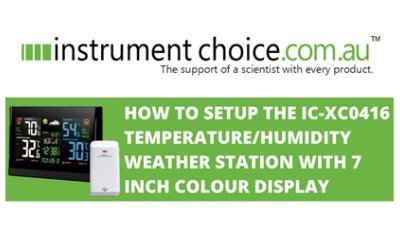
How to Setup the IC-XC0416 Temperature/ Humidity Weather Station with 7 Inch Colour Display

Figure 1 Watch an Instrument ChoiceScientist set up the IC-XC0416 Temperature/ Humidity Personal Weather Station here.
How to Setup the IC-XC0416 Temperature/ Humidity Personal Weather Station
Battery Installation and Sensor Connection
- Powering the outdoor sensor:
1.1.Open the battery compartment at the rear of the sensor
1.2.Insert two AA batteries; and
1.3.Replace the battery cover. - Powering the indoor console:
2.1.Plug the indoor console into a power source; and
2.2.Install the three AAA backup batteries (recommended). - Wirelessly connecting the indoor console with the outdoor sensor:
3.1.Once the installation of the outdoor sensor and indoor console’s power sources has completed, the station will automatically search, connect and start transmitting data; and
3.2.Once the outdoor sensor and indoor consoles are wirelessly connected, outdoor temperature and humidity data readings will appear on the LCD.
Time Settings
- Time Set:
1.1.Press and hold the TIME SET key for two seconds to enter the time setting mode
1.2.Once in time setting mode “12 or 24 hr” will blink on the screen
1.3.Press the UP and DOWN selection arrows to adjust your selection then press TIME SET again before moving to the next time setup option – use this method to adjust your:-
- Hours
- Minutes
- Seconds
- Years
- Dm Or Md View
- Current Month
- Day
- Time Offset; and
- Language.
-
- When you have finished running through the time options, press TIME SET again, or press no key at all for 60-seconds to save your setting and return to the home screen.
Alarm Setup
View Alarms
- On the home screen, pressing and releasing the ALARM button will show the alarm time and turn the alarm on or off.
Adjust Alarms
- Press and hold the ALARM key to enter into alarm settings
- Use the UP and DOWN selection arrows at the top of the screen to adjust the alarm parameters and press the ALARM button to move onto the next setting
- You can adjust the ALARM HOUR and ALARM MINUTE; and then
- Press ALARM again to exit alarm settings.
Alert Setup
- Press and hold ALERT for 2 seconds to enter the TEMPERATURE ALERT setting mode. As with previous settings, use the UP and DOWN selection arrows at the top of the screen to adjust parameters and press ALERT again to move to the next adjustment item.
- The first item you see flashing is IN. Press the UP and DOWN selection arrows to choose between alerts for indoors (IN) or outdoors (OUT).
- Press ALERT again to move to other parameters.
- For all the parameters, press the UP and DOWN selection arrows to change the alert icon.
- Then pressing ALARM (NOTE: not alert) will turn the ALERT function on (you’ll see the icon visible on the screen) or off (no icon visible).
- Repeat steps 1-5 to turn ON/OFF and set high and low-level alerts for the indoor and outdoor temperature and humidity.
Outdoor Sensor Channels
- The next function button is a dual-function CHANNEL and UP SELECTION key.Pressing and releasing this button allows you to toggle through channels 1-8 of the outdoor sensors; and
- Pressing and holding the CHANNEL key will trigger auto-cycle mode for channels 1-8.
Minimum and Maximum Memory
- Pressing and releasing the MEM key will trigger auto-scrolling through recorded maximum and minimum readings for all recorded parameters, including each CHANNEL’s:
- Outdoor maximum temperature
- Outdoor minimum temperature
- Outdoor maximum humidity
- Outdoor minimum humidity
- Indoor maximum temperature
- Indoor minimum temperature
- Indoor maximum humidity
- Indoor minimum humidity
- Maximum barometric pressure reading; and
- Minimum pressure reading.
- To erase any minimum and maximum records for a selected parameter press and hold the MEMORY key when viewing your min/max results.
View Data History
The indoor console records the past 24 hours of weather data automatically, which includes indoor and outdoor temperature/humidity, barometric pressure, dew point and heat index records.
- Press the HISTORY key to check all records. Each button press moves the display back an hour and shows the historical data from that time.
Sensor Receiving Mode
- To enter into the sensor receiving mode, locate the SENSOR button on the back of the indoor console. Use this mode for setting up any additional or replacement sensors.
Barometric Pressure Setup
- Pressing and releasing the BARO button changes the barometric pressure readout. Press to select between mmHg and hPa.
- Pressing and holding the BARO key allows you to change between the display of ABSOLUTE PRESSURE and RELATIVE PRESSURE readouts. To adjust;
- Press and hold the BARO key. When RELATIVE or ABSOLUTE start to blink on the screen, press the UP and DOWN selection arrows to select the pressure readout; and then
- Press BARO again to confirm your choice.
- If in step 2, the RELATIVE PRESSURE readout is selected, you can adjust the relative pressure value using the UP and DOWN selector keys. Press BARO to confirm and save settings.
Conclusion
The IC-XC0416 Personal Weather Station offers an extensive and effectual sensor array to monitor various indoor/outdoor environmental conditions. The indoor console features intuitive navigation that allows users to adjust what they see on the screen as well as set alerts, alarms and view history.
The setup of IC-XC0416 is straightforward if you follow the steps provided in this video.
If you have any concerns about setting up your IC-XC0416 Personal Weather Station or if you’d like to learn more about this device, check out the links below or contact us!
Additional links
- View the Temperature/Humidity Personal Weather Station with 7 Inch Colour Display
- The IC-XC0416 can connect to a total of 8 outdoor sensors. Check out the additional sensors here.
- Watch "How to Setup the IC-XC0416 Temperature/ Humidity Personal Weather Station with 7 Inch Colour Display" again.
- Want to see what comes in the box? Watch an Instrument Choice Scientist "Unboxing the IC-XC0416 Temperature/ Humidity Personal Weather Station with 7 Inch Colour Display"

Also interesting
The Instrument Choice Team of Scientists regularly reviews new and popular products, so when searching for the perfect scientific instrument for your application, you can make more informed decisions.
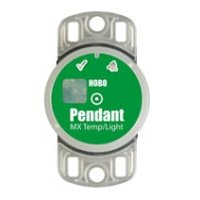
In this edition, we review the Hobo MX2202 Pendant Mx Temperature/Light Data Logger giving an overview of the key features and specifications. We like the MX2202 because this market-leading data logger offers a range of user-friendly features that streamline the monitoring of temperature and light in almost any salt or freshwater body.

With summer approaching and the weather heating up, one of the most common questions put to the Instrument Choice Scientists is "What's the difference between Wet Bulb Temperature and Wet Bulb Globe Temperature?"
In this article, we define each of these measurements while providing product examples to help solidify the differences between the two parameters.

