How to Setup the IC-XC0436 Wireless Digital Weather Station with Colourful LCD Display and WiFi

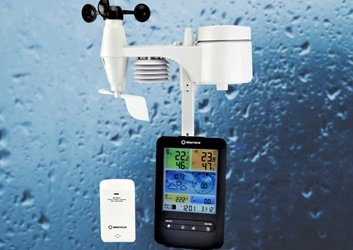
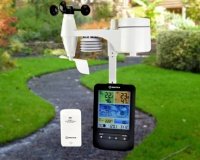
Instrument Choice Scientists often get asked how to set up some of our most popular products. This edition demonstrates how to commission your IC-XC0436 Wireless Digital Weather Station – an outstanding device with advanced features, WiFi connectivity, straightforward operation and accessible price.
Figure 1 Watch an Instrument Choice scientist demonstrate how to set up the IC-XC0436 Wireless Digital Weather Station with Colourful LCD Display and WiFi here.
How to Setup the IC-XC0436 Wireless Digital Weather Station with Colourful LCD Display and WiFi
Insert the Batteries
- Insert the batteries into the 5-in-1 sensor. To do this:
- Turn the 5-in-1 sensor upside down. Avoid applying too much pressure to the station while in this position to prevent damaging the wind cups.
- Unscrew and remove the battery compartment door.
- Install three AA batteries.
- Before replacing the battery door cover ensure the O-Ring remains in place. The O-Ring will ensure the battery compartment remains water-resistant.
- Screw into place. The LED light will begin to flash every 12-seconds.
- Insert the batteries into the additional temperature and humidity sensor. To do this:
- Slide off the battery cover door on the temp/humidity sensor.
- Insert two AA batteries.
- Replace the cover.
- Power up the indoor console. To do this:
- Use a small coin to twist and remove the battery compartment cover on the back of the indoor console.
- Install the backup CR2032 battery and replace the cover.
- Plug the power adapter into the console and a power supply.
- Wait as the console automatically connects to the wireless sensors.
Install Mounting Pole
For this, you will need the pole, mounting base and the two small screws and nuts from the mounting hardware kit.
- Insert the pole into the sensor. Ensure the small arrow on the pole aligns with the line on the station.
- Place the nut in the hexagonal hole then insert the screw from the other side.
- Tighten the screw using a small screwdriver.
- Insert the other side of the pole into the mounting base. Again, ensuring the arrow on the pole aligns with the line and arrows on the base.
- Place the nut in the hexagonal hole, insert the screw from the other side and tighten using a small screwdriver.
- The outdoor sensor is ready for outdoor installation.
Set up the Indoor Console
LCD Viewing Angle
The LCD viewing angle may need to be adjusted depending on how you place or mount the LCD. To change;
- Install your console in its final position.
- Press the up and down selector keys on the unit's back until the digits are at their clearest.
Time and Date Options
Setting the Time and Date Manually
The console obtains the local time through the assigned internet time server. If you want to use it offline, you can set the time and date manually. To do this;
- Press and hold the “CLOCK SET” key for two seconds. Digits will flash in place of the time.
- In each of the settings use the up and down arrows on the back to adjust the value, then press “CLOCK SET” to move onto the next option. The options will appear in the following order:
- “Time Zone”
- “Daylight Savings Time ON/OFF”
- “Hour”
- “Minute”
- “12/24” format
- “Year”
- “Month”
- “Day”
- “M-D” or “D-M” format
- “Time Sync ON/OFF”; and
- “Weekday Language”.
- After cycling through the options, the unit will return to the home screen, or you can exit at any time by pressing “CLOCK SET” for two seconds.
Adjust Time and Date Display
- Press the “CLOCK SET” key while on the home screen to switch between the display of “Year” or “Date” in the bottom corner.
Time Alarm
Setting the Time Alarm
- Press and hold the “ALARM” key for two seconds until the alarm hour digit begins to flash.
- Use the up and down selector keys to adjust the value then press “ALARM” to confirm and move onto the next value.
- Repeat the same for the minute. Pressing “ALARM” to confirm the minute will take you out of alarm setting mode and return you to the home screen.
- The small bell icon will appear indicating the alarm is set and switched on.
Switching ON/OFF Alarm and Ice-Alert
- When pressing and releasing the “ALARM” button from the home screen, you can see that the alarm time setting is 5-seconds.
- When the alarm time is displaying, press the ALARM button again to cycle through the following options:
- Activation of the “ALARM” function
- Turn on the “ICE ALERT” Alarm; and
- Turn all alarms “OFF”.
Resetting the Alarm
- When the alarm sounds, it can be stopped by either:
- Letting it ring for two minutes – it will then switch off automatically
- Pressing “SNOOZE”: this will delay the alarm for an extra 5 minutes
- Pressing and holding “SNOOZE” for two seconds stops the alarm sound and resets it for the following day; or
- Pressing “ALARM” will stop the alarm and reset it for the following day.
Temperature Value
Use the °C / °F slide switch to select the temperature display unit. This switch will update the display instantly.
Wind Speed Settings
Select Between Average Wind or Gust Display
- Press the “WIND” button to cycle between the average/gust value. This command appears in the centre of the wind direction compass.
Adjust Wind Speed Unit
- To adjust the display unit, press and hold the “WIND” button until the unit flashes.
- Use the up and down arrows on the back to adjust. Pressing the arrows will cycle through the available units of “m/s”, “km/h”, “knots” and “mph”.
- Once your desired unit is on the LCD, press “WIND” confirm your selection and return to the home screen.
Weather Index Settings
Move Between the Display of Weather Indexes
- To move between the weather indexes, press the “INDEX” key on the front. Pressing this button allows you to cycle through and select from the following setting options:
- The “Feels Like Temperature”
- “Heat Index”
- “Wind Chill”; and
- “Dew Point”.
Barometric Pressure Settings
Select Absolute or Relative Barometric Pressure View
- To change the view between absolute and relative barometric pressure, press the “BARO” button located on the console's front.
Adjust Displayed Barometric Pressure Unit
- To adjust the displayed barometric pressure unit, press the “BARO UNIT” button on the console's back. Each press of the key will allow you to cycle through the following setting options: “hPa”, “inHg” or “mmHg”. When your desired unit appears on the LCD, press no keys. Your selection will remain on the screen and set automatically.
Rainfall Settings
Rainfall Display Mode
- To select the rainfall display mode press the “RAIN” button. Each press of the button will cycle through the following rainfall display options: “Hourly”, “Daily”, “Weekly”, “Monthly”, “Total” or “Rate”. When your desired unit appears on the LCD, press no keys. Your selection will remain on the screen and set automatically.
Rainfall Unit Adjustment
- To adjust the displayed rainfall unit press and hold the “RAIN” key for two seconds to enter the unit setting mode.
- Press the up and down selector keys to toggle between the display in inches or millimetres.
- When the measurement unit you require appears on the LCD press “RAIN” to confirm your choice, then return to the home screen.
Reset the Rainfall Record
- To reset the total rainfall record (recommended after first installing your unit) go to the home screen, then press and hold the “HISTORY” key for 2-seconds. Your console will beep to confirm the reset.
MIN/MAX Data
View MIN/MAX Data
- Press the MAX/MIN button to view the accumulated minimum and maximum weather data with the corresponding timestamp. MIN/MAX values will appear in the following order;
| a) Indoor or current channel MAX temperature b) Indoor or current channel MIN temperature c) Indoor (or current channel) MAX humidity d) Indoor (or current channel) MIN humidity e) Outdoor MAX temperature f) Outdoor MIN temperature g) Outdoor MAX humidity h) Outdoor MIN humidity i) MAX average wind speed j) MAX gust k) MAX relative pressure l) MIN relative pressure |
m) MAX absolute pressure n) MIN absolute pressure o) MAX Feels like p) MIN Feels like q) MAX heat index r) MIN heat index s) MAX wind chill t) MIN wind chill u) MAX dew point v) MIN dew point w) MAX daily rainfall. |
Delete MIN/MAX Data
- To delete a MIN/MAX record go to the record by following the steps above.
- Press the MAX/MIN button for two seconds. The device will beep as the record deletes.
Data History
- The console stores collected weather data from the past 24-hours. Each press of the “History” button will take you to the beginning of each recorded hour. The time the data was recorded, and the data captured from each hour will display.
Weather Alerts
Setting Weather Alert Values
Adjustable alerts and the available ranges on the IC-XC0436 Weather station are:
Alert Reading |
Available Range |
|
Indoor Temperature High Alert |
-40°C to 80°C |
|
Indoor Temperature Low Alert |
|
|
Indoor Humidity High Alert |
1% to 99% |
|
Indoor Humidity Low Alert |
|
|
Outdoor Temperature High Alert |
-40°C to 80°C |
|
Outdoor Temperature Low Alert |
|
|
Outdoor Humidity High Alert |
1% to 99% |
|
Outdoor Humidity Low Alert |
|
|
Average Wind Speed |
0.1m/s to 50m/s |
|
Pressure Drop |
1hPa to 10hPa |
|
Hourly Rainfall |
1mm to 1000mm |
- To set an alert press the “ALERT” button until the parameter you wish to set an alert for displays on the screen.
- On that parameter press and hold the “ALERT” key for two seconds – until the reading starts to flash.
- Use the up and down arrows to adjust the value.
- Press “ALERT” again to confirm the value. Now the value is set, use the “ALARM” key to switch the alert “ON” or “OFF”. When an alert is activated, the small alert icon will appear next to the parameter. When deactivated, no icon will be visible.
- Press “ALERT” again to move onto the next parameter.
Temperature and Humidity Trend
The temperature/humidity trend indicator shows the trends of changes expected over the next few minutes. Figure 1 (below) shows the arrow indicator, which will appear and what they mean.

Figure 1 The Temperature and Humidity Trend icons for the IC-XC0436 Wireless Digital Weather Station
Comfort Indicator
The comfort indication uses indoor air temperature and humidity measurements to determine occupant comfort level. One of three possible comfort indicator icons may appear. Figure 2 (below) shows each of the three icons and what they mean.

Figure 2 The comfort indicator icons for the IC-XC0436 Wireless Digital Weather Station
Forecasting Icons
The built-in barometer senses atmosphere pressure changes. The data collected can predict the weather conditions for 12-24 hours within a 30-50km radius. Figure 3 shows the forecast icons and what they mean.

Figure 3 The forecast icons and what they mean for the IC-XC0436 Wireless Digital Weather Station
Conclusion
The IC-XC0436 Wireless Digital Weather Station is easy to set up and operate. We are impressed with the advanced features it offers, usually found in higher-end stations.
For more information on this station see the links below or contact us!
Additional links
- View the IC-XC0436 Wireless Digital Weather Station here
- Watch "How to Setup the IC-XC0436 Wireless Digital Weather Station with Colourful LCD Display and WiFi "
- Now you have your IC-XC0436 Digital Weather Station setup, its time to connect it to WiFi. Learn how here.

Also interesting
The IC-XC0436 Wireless Digital Weather Station is a budget-friendly, WiFi weather station which connects to the third-party weather sites WeatherUnderground and Weather Cloud. Once connected to either of these platforms, you can log in and view your hyperlocal weather data from anywhere.
So, if you already have, or are looking to purchase an IC-XC0436 digital weather station, read these step-by-step instructions to see just how straightforward the process is.

A caliper is a well-known and relatively commonplace instrument. But what is a Digital Vernier Caliper? This article explains what these instruments are, how they work and provides some excellent product examples.
Discover everything you need to know about digital vernier calipers here

