How to Use the Expert CTS Pocket Water Quality Tester (IC-EXPERTCTS)

The Expert CTS Water Quality Pen Tester is a great choice if you need an instrument that offers a combination of:
- Features perfect for various water quality testing applications – like environmental monitoring, electroplating, agriculture, and education
- Portability – fits snuggly in your pocket; and
- Accurate conductivity, TDS, salinity and temperature measurements.
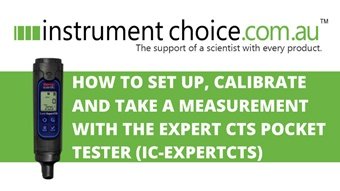
Figure 1 Learn How to Use the Expert CTS Pocket Water Quality Tester here.
How to Setup the Expert CTS Pocket Water Quality Tester
FIRST USE
If it is your first time using this meter, you will need to perform electrode conditioning. Here is how you do it:
- Remove the sensor cap.
- Add at least 20mm of tap water to the sensor cap.
- Recap the tester and leave it for 15 minutes.
- After 15 minutes has elapsed, discard the water. The sensor is ready for use.
SETUP OPTIONS
When in the setup menu, press the MENU key to cycle through your setup options. Press ENTER to enter into submenus and select options. To exit the setup menu, press CAL at any time.
- Press MENU to enter into the setup menu.
- The screen will display “PArA” this is the measurement parameter selection submenu. To enter the measurement parameter submenu, press ENTER.
- Press the MENU key to cycle through measurement parameter options of conductivity, TDS or salinity.
- When your required parameter is on the LCD, press ENTER to confirm. The device will automatically return to the main menu with your option saved.
- Press MENU to move onto the next option.
- The screen will display “tdS.F” this is the TDS factor setting To enter into the TDS factor submenu, press ENTER.
- The default setting is 0.71. To adjust, press the MENU key to scroll through in 0.01 increments. Press and hold MENU to scroll through in 0.10 increments.
- When your required TDS factor is on the LCD, press ENTER to confirm. The device will automatically return to the main menu with your option saved.
- Press MENU to move onto the next option.
- The screen will display “r.Set” this is the reset of the calibration to the factory default Press ENTER select this submenu.
- Press MENU to cycle between YES (factory reset) and NO (do not reset).
- When your required option is on the LCD, press ENTER to confirm. The device will automatically return to the main menu with your option saved.
- Press MENU to move onto the next option.
- The screen will display “dEg” this is the temperature display adjustment menu. Press ENTER to view the submenu.
- Press MENU to choose the temperature display between Celcius or Fahrenheit
- When your required temperature display is on the LCD, press ENTER to confirm. The device will automatically return to the main menu with your option saved.
- Press MENU to move onto the next option.
- The screen will display “t.CAL” this is the temperature calibration option. Press enter to view the temperature calibration submenu.
- In the menu, press the MENU key to adjust the temperature as required.
- If temperature calibration was required, press ENTER to confirm when the adjusted value is displayed.
- The device will automatically return to the main menu.
- Press MENU, this time returns to the start of the main menu, and the LCD will again display “PArA”. Press CAL to exit the setup menu and return to measurement mode.
How To Calibrate Conductivity on the Expert CTS Pocket Water Quality Tester
For best results, calibrate your Expert CTS water quality tester using a standard conductivity solution. The calibration frequency will depend on the required accuracy and frequency of use. Where more accurate results are essential, or the meter is used often, calibrate it daily. If the meter is not in regular use and you can accept a standard level of accuracy, less frequent calibration is OK. We recommend you use a standard calibration solution that is close to your intended sample value.
The Expert CTS automatically recognises the following conductivity calibration standards:
- 80 (84 μS/cm)
- 1410 (1413 μS/cm); and
- 90 (12.88 mS/cm).
To perform a calibration:
- Dip the sensor in at least 30mm of your chosen calibration standard.
- Stir gently and press CAL to begin the calibration.
- The display will show CAL followed by the default value. CAL will remain on the LCD during the calibration mode.
- When the meter recognises the calibration buffer, the value will appear on the LCD. If the buffer value has been identified correctly, press ENTER accept.
- The screen will show “done” then return to measurement mode. Calibration is complete the device is ready to take measurements.
How To Take A Measurement with the Expert CTS Pocket Water Quality Tester
- Dip the sensor in at least 30mm of test solution - or up to the max fill line if you’re using the included cap.
- Stir gently and wait for the stability icon to stop blinking.
- Once the tick stability indicator stops blinking and a tick appears on the screen display, take your final reading.
Conclusion
The IC-Expert-CTS is a straightforward and affordable solution for measuring four essential water quality parameters.
For more information on this how to use this practical pocket water quality tester, see the links below or contact us!
Additional links
- View the Expert CTS Pocket Water Quality Tester
- Discover the range of Water Quality Testers by Eutech Instruments
- Browse Conductivity, TDS, Salinity Water Quality Testers at Instrument Choice
- Watch “How to Use the Expert CTS Pocket Water Quality Tester”
- Want to see what comes in the box? Watch an Instrument Choice Scientist “Unboxing the Expert CTS Pocket Water Quality Tester”.

Also interesting
For consistent and accurate measurements with your Hanna HALO pH meter, it is essential to perform regular pH calibration. This how-to guide explains the correct calibration method for this excellent device.
Learn how to calibrate the Hanna Halo pH meter here

Humidity is the presence of water vapour in the air. It's measured in industrial spaces, greenhouses, museums, laboratories, and homes by various devices, each with different specifications and capabilities to meet specific applications.
Click here to check out some of the best tools for measuring humidity

