Instrument Choice Experiment: Where is the Best Place to Position a Food Fridge Thermometer?

The Science Behind the Experiment
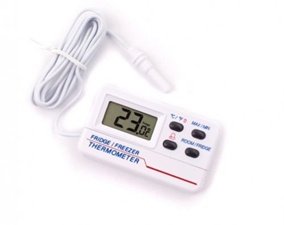
Fridge thermometers are small, easy-to-use, and cost-effective devices that monitor a fridge or freezer's temperature during everyday use. They are an indispensable tool for any home, business or institution that needs to store perishable food items.
These are the main reasons why fridge temperature is critical:
- Illness. Less than 5°C and more than 60°C is the safe temperature zone for food. Food stored between 5°C and 60°C is the food danger zone where food poisoning bacteria may be present – even multiplying to dangerous levels.
- Food spoilage. If not appropriately chilled, dairy products, meats, fruits, and vegetables will spoil faster than if stored at the correct temperature.
Refrigeration temperatures are not a matter of ‘set and forget’ - even models with built-in thermometers require periodic checks to ensure adequate cooling.
Fridge temperature variations occur for several reasons:
- Fridge design and cooling mechanism location - There are cooler and warmer areas within a cooling unit. Typically, the warmest areas are the doors and the top shelf. The rear wall and bottom shelves are generally cooler.
- Capacity - Overpacking a fridge or freezer will reduce airflow so cooler air may not reach where it’s needed, compromising the fridge’s ability to keep your food cold.
- Traffic - Temperature fluctuations occur as doors are opened and closed.
- External Temperature – Seasonal temperature fluctuations will impact the performance of your cooling unit.
The Experiment
Method
To obtain an accurate overall representation of your refrigerator’s internal average temperature, you need to find the midpoint between the cooling mechanism and sources of heat ingress (i.e., the door). To determine this “midpoint” (i.e., optimum fridge thermometer placement) and demonstrate the significance of temperature variations, we systematically measured internal fridge temperatures in different sections over 6.5 hours.
Materials Used
- 4 x EL-USB-1 Temperature data loggers; and
- A computer to set up and view data.
Method
- Setup the EL-USB-1 data loggers to begin logging at 930 am.
- Place loggers in the refrigerator in the predetermined locations at 830am. See image 1 (below).
- Logger A on the top/centre shelf at the front
- Logger B on the top/centre shelf at the back
- Logger C in the door where higher temperatures are likely, and;
- Logger D in the “chiller” box.
Figure 1 Logger location for fridge experiment
- Leave to record.
- After 6.5 hours have elapsed remove loggers and download information to a PC.
Results & Discussion
Figure 2 (below) details results from the four data loggers over 6.5 hours.
Logger C (closest to the door) experienced the greatest temperature fluctuations recording temperatures ranging from 2°C up to 5.5°C. Logger D (located at the bottom) recorded higher than expected temperatures and remained in the danger zone.
Scientist’s Tip: Installing a fridge thermometer in any of these locations could provide a false indication of a fridge’s overall temperature.
Loggers A and B recorded temperatures within the safe temperature zone and show the consistency expected in this section of the fridge i.e. the approximate midpoint between the cooling mechanism and the main source of cool air loss (i.e., the door). The fluctuations shown by A and B are the fridge compressor switching on and off striving to achieve the set temperature - this is expected. Loggers A and B gave the best indication of average fridge temperature, averaging 1.4°C and 0.9°C respectively.
Figure 2 Fridge temperature analysis results
Conclusion
We conclude that the position of a fridge thermometer does matter, there are clear differences in temperature throughout the refrigerator. For this example, we found the optimum place to record temperature is just below the top shelf, either in the middle of the shelf or slightly closer to the door. Of course, this placement will vary slightly, depending on your cooling device's make and model.
PS: The final resting place chosen for our fridge thermometer was location A. See Figure 3 (below) for an example of our IC7209 in place.

Figure 3 IC7209 with the sensor installed at the top shelf, closer to the door
You can do this experiment at home using a fridge thermometer with MIN/MAX functions. Keep your thermometer in the critical areas of the fridge for 24 hours at a time, recording the minimum and maximum temperature. Record results and then reset your thermometer before each move. The spot in the fridge's body (i.e. excluding the door) recording the highest average temperature is the place to keep your thermometer.
Do you need a hand installing or finding the right spot for your fridge thermometer? View the Top 5 Fridge-Freezer Thermometers at Instrument Choice or speak with an Instrument Choice Scientist! We’re here to help!
Call 1300 737 871 or email [email protected].
Also interesting
There are currently over 150 refractometers available in the Instrument Choice online store, including meters measuring Brix, Refractive Index and Moisture Content. With so many to choose from finding the best refractometer for your application can seem a daunting task.
To help Instrument Choice Scientists have put together several handy tips to help you choose the best refractometer for your application.
View the tips here

Instrument Choice regularly reviews new and popular products, so when searching for the perfect scientific instrument for your application, you can make more informed decisions.
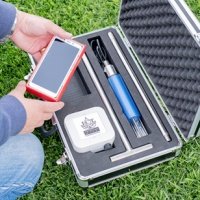
This review assesses the Instant Soil Moisture Reading Kit (Product Code: IC-MPKit-406B). This sought-after, reliable and portable soil moisture sensor doesn’t require regular calibration and accuracy is unaffected by temperature. Its impressive features and functions make it ideal for soil moisture testing applications, such as sports fields, irrigation monitoring, academic research, and more.
Read on for a scientists’ review of the IC-MPKit-406B kit.

